Make Beads for Jewelry Making
by The Fun Team - Edited and Expanded

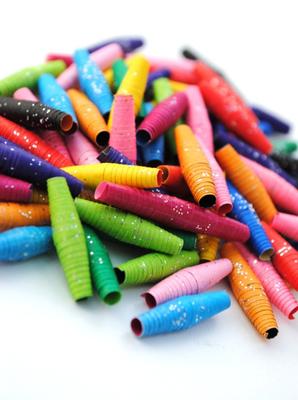
Paper Beads

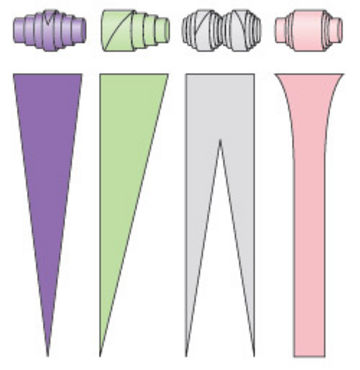
Paper Beads Template

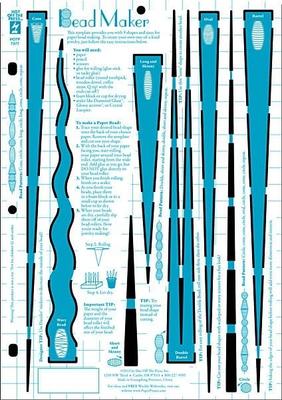
Paper Bead Pattern

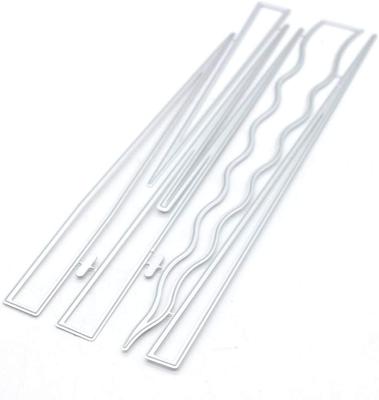
Paper Bead Stencil
There are many ways to make jewelry, for example, you buy beads at a craft store and string them together with string. Well that's making jewelry but instead of the plain old same old you could make unique, one of a kind beads at your very own home. Read on if you want to learn...
1. Make Clay Beads
You can use air dry clay, no need to bake.
With air dry clay, the first part is done!
What you're going to need is air dry clay, paint and a toothpick. Grab a little bit of air dry clay and get a marker or pencil or rolling pin and roll the clay into a rectangle get your toothpick and shape the rectangle around the toothpick. Done! Wait until it's dry, remove the toothpick, paint and glaze it.
2. Make Dough Beads
Do the same thing, except mix flour or cornflour and water together to make dough/clay, also known as porcelain clay if you search on YouTube for "how to" or recipe videos. You can use food coloring to color the dough. There are a plethora of recipes available on YouTube if you search for homemade porcelain clay, where you can see the exact process.
3. Make Paper Beads
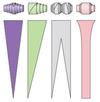
Cut out long thin paper-length triangles in various sizes from paper, decorate your triangles or use scrapbook paper. The process is simply to cut paper triangles (really long ones), roll them up, and seal. You can start by practicing with normal letter size or A4 size paper sheets. Measure 1 inch wide at the top of the page with two dots, and take the two dots down towards the end of the sheet to form a triangle. Do the same with different sized rectangles from the top to bottom of the page, cut and roll up. You can even use pages from magazines, gift wrapping paper or any other patterned paper you have on hand. You can make them as wide as you like, 1 inch is nice and half an inch for smaller beads works great.
Take a toothpick and a glue stick.
Place some glue on the triangle's narrowest tip (roughly about 1 inch in length). Then roll the triangles onto the toothpicks, starting from the widest side of the paper. Smooth the last bit with the glue on over a few times for a strong hold. Place one side, waiting for the glue to dry, then remove the toothpick after a few minutes. Your beads are done!
Tip: You can stack more than 1 paper triangle/rectangle on top of each other before rolling. The more you stack on top of each other before rolling, the bigger your bead will be. I have seen beads made with up to 20 triangles stacked on top of each other.
The real fun starts when you start playing around with different shapes, different sizes and different numbers of sheets stacked on each other and then off course combining different shapes and sizes to form out of the ordinary shaped beads.
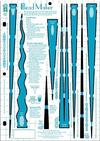
The blue paper bead pattern in the image above use to be for sale, but it's been out of stock for a long time. We will update the links to the sales page once they are back in stock.
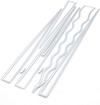
You can find the same shape die cut stencils below, they work really great both as a die, as well as a stencil to trace onto paper.
Just click on the links:
Paper Beads Rectangular Die Cut Template
Paper Beads Triangular Die Cut Templates
You can also buy paper bead rollers, but I still prefer a toothpick and more so, a thin steel knitting needle for better grip, to me the inside of the beads just looks neater. Some people have trouble holding the paper to the knitting needle/toothpick, their hands start to cramp. In this instance a paper bead roller is ideal, you just slot the start of the paper into the groove of the pin and start rolling the handle with two fingers.
Paper Bead Rollers
If you want your beads all glossy or shiny like the beautiful store bought beads, give them a coat of varnish or a few coats, letting each coat dry, if you want more shine. Just paint sealant on with a small paint brush and let them dry on the toothpick, lodging one end of the toothpick into one of those green blocks of florist foam. I use these 4 brands as varnish, depending on how many beads I want to seal, but you can use whichever you like best!
Diamond Glaze
Triple Thick Gloss
Mod Podge Mat
Water Based Wood Hardener
If you are making a lot of beads at a time, it is time-consuming to seal them with a paint brush, you may want to string and dip them, I highly recommend SantaFeLady's video on YouTube, the method I use.
Find more paper bead inspiration at the link below, just open the paper beads board and remember to "follow" us for more ideas there:
Paper Beads
Lastly, no paper, no clay, you can actually use fabric cut into strips too! You will also find "Fabric Beads" and plenty of Clay Recipes at the same link as for "Paper Beads".
Hope you have fun making beads!!
Our recommendations make it easy to find the perfect fun products. There are more than 30 categories. Click on any image below to view.
More than 25 000 fun ideas posted over the years, including but not limited to: free printable goodies, party ideas for old and young, fun games, amazing arts and crafts, funny stuff, free templates and so much more - LOOK HERE! + follow us!
